Rebates
Ontario Rebate Photo Requirements for 2026 Claims
Ontario rebate before and after photos required 2026: what to capture before work starts, after installation, and before upload.
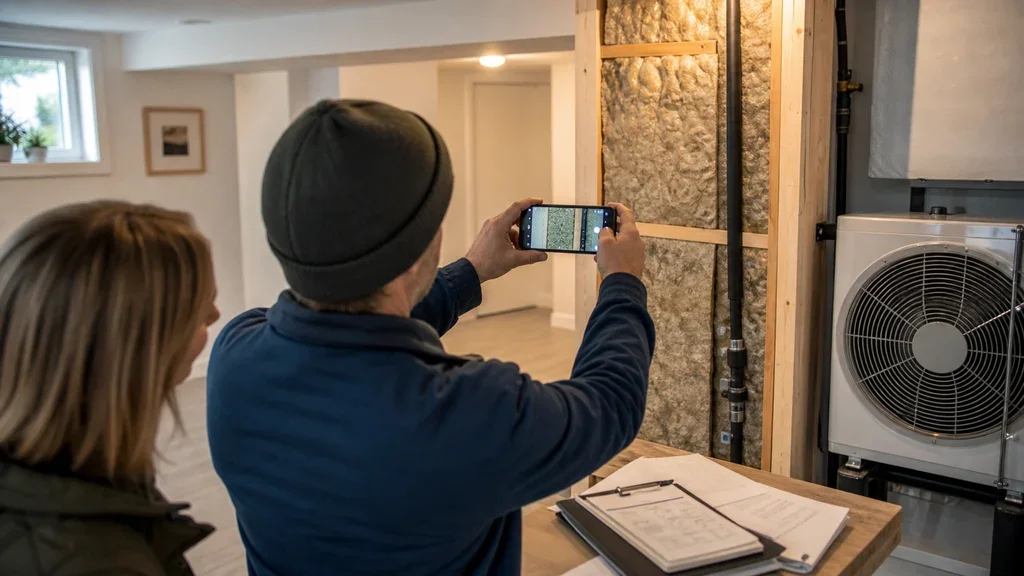
Ontario rebate before and after photos required 2026 is really a documentation question: what proof should you capture before a contractor removes the old equipment or closes up the work area? The practical answer is to photograph anything that proves the original condition, the installed upgrade, and the model or material details that match your invoice.
Do not treat photos as an afterthought. Rebate files are easier to defend when the pictures, invoice, assessment notes, and payment proof all tell the same story.
| What you see | Likely cause | First move |
|---|---|---|
| A contractor says photos are optional | They may be thinking of their own sales file, not the rebate checklist | Ask which program stream applies and request the upload checklist |
| The old furnace, boiler, tank, or appliance is being removed | Old-equipment proof can disappear once demolition starts | Photograph the full unit and nameplate before removal |
| Insulation or air sealing will be covered up | The finished wall, attic, or rim joist may hide the work | Take during-work photos before surfaces are closed |
| The portal rejects an image | The photo may be blurry, cropped, missing a label, or too vague | Retake from farther back and add a straight-on close-up |
| The invoice does not match the photo evidence | Model numbers, quantities, or work areas may be unclear | Ask for a corrected invoice before submitting |
Ontario rebate before and after photos required 2026: the short answer
Expect to need clear photos when the rebate administrator must verify what existed before, what was installed after, or which model was used. That is especially common for equipment changes, solar and battery installations, and upgrades where labels or nameplates prove eligibility.
Assessment-required work can be a bit different. A registered energy advisor may document the home during the initial and follow-up assessments, but you should still keep your own photo set because contractors, invoices, and uploads can all need backup.
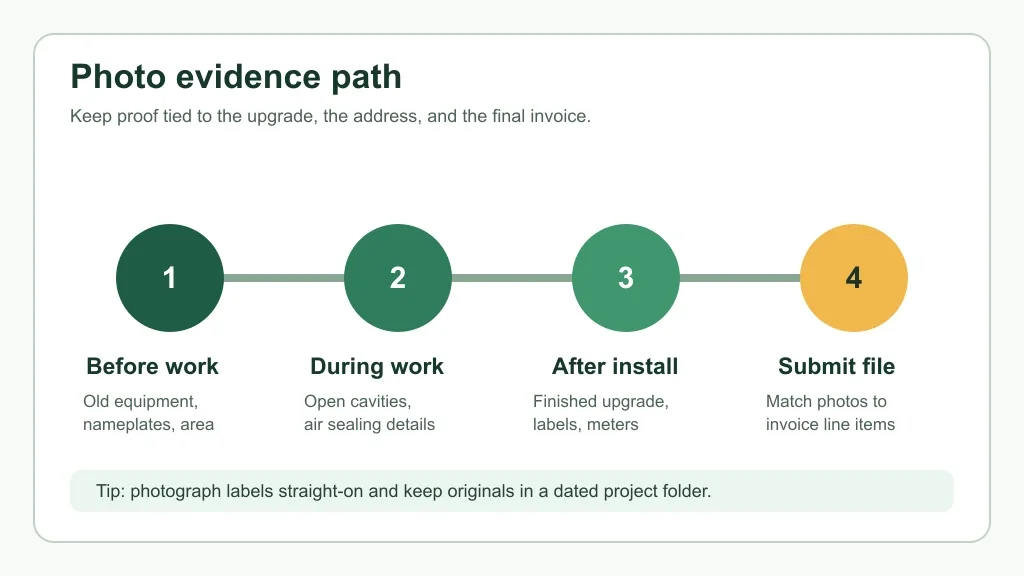
What to photograph before work starts
Start with the old condition. For heat pumps and fuel-switching projects, that usually means the existing heating system, air handler, boiler, furnace, oil tank area, electric baseboards, or other equipment that proves what is being replaced.
Get one wide photo first. Then take close-ups of nameplates, model stickers, serial numbers, fuel connections, meters, thermostat locations, and any area the contractor will cover or remove.
Insulation projects need a different mindset. For attic, basement, exterior wall, and air sealing work, photograph the starting condition, visible depth markers, rim joists, wall cavities, penetrations, and draft-sealing areas before they disappear behind new material.
If attic work is on your list, pair your photos with the attic insulation R-value rebate guide and the attic insulation participating contractor guide. For foundation work, use the basement insulation assessment guide before the walls are closed.
What to capture during and after installation
During-work photos are useful when the final surface will hide the improvement. Air sealing, exterior wall insulation, basement insulation, and attic upgrades can all leave very little visible evidence once the job is neat and finished.
After installation, take a clean wide shot of the completed upgrade, then a straight-on close-up of any required label. For equipment, that means nameplates. For solar and batteries, it can mean panels, inverters, battery units, utility meters, and manufacturer labels.
Windows and doors deserve their own set. Photograph each replaced opening, keep the count consistent, and make sure your invoice describes the same work shown in the images. The window and door assessment guide and window rebate invoice checklist are useful here.
How photos fit with assessments, quotes, and invoices
Photos do not replace paperwork. They support it.
Your rebate file should connect four things: the assessment or pre-approval path, the contractor quote, the final invoice, and the payment record. If one piece says attic insulation and another says general renovation, expect questions.
Before signing, compare your documents with the contractor quote checklist. Before uploading, use the payment proof checklist so the photos are not carrying the whole file by themselves.
Energy advisor costs and assessment timing also matter. If your project uses an assessment-required path, read the energy advisor cost guide and keep the assessment report in the same folder as your images.
Measure-by-measure photo notes
Heat pumps and water heaters
For heat pump projects, photograph existing equipment before it leaves the home. The Home Renovation Savings heat pump requirements document calls for photos of the existing heating system and corresponding nameplates, with examples such as furnaces, boilers, air handlers, baseboards, and wood stoves depending on the home.
If you are planning a water heater claim, the heat pump water heater assessment path explains where that project sits. For larger fuel-switching projects, separate your notes with the propane to heat pump rebate guide or oil to heat pump rebate guide.
Also confirm contractor status before work starts. Use the participating contractor list guide and the heat pump pre-approval checklist before assuming the photo set will save an otherwise weak file.
Solar panels, batteries, and meters
Solar files are more explicit than many homeowners expect. The Home Renovation Savings solar post-installation checklist says installation photos must be clear, and it lists examples such as installed panels, nameplates, battery storage, inverters, and utility meters.
That is a good standard for every rebate project. Clear beats clever. Take the wide shot, take the label shot, and keep the originals.
Insulation and air sealing
Insulation photos should show the original condition, the work in progress, and the completed area where possible. For exterior wall work, the exterior wall insulation rebate guide can help you think through what gets hidden during the job.
Air sealing is even more dependent on proof and testing. Use the basement air sealing rebate rules and the blower door test guide to keep the photo record tied to the actual scope.
How to organize photos before uploading
Create one project folder before the first appointment. Use short names like before-furnace-nameplate, after-heat-pump-outdoor-unit, attic-before-depth, and invoice-final-paid.
Keep original files, even if you make smaller copies for upload. Original timestamps can help if a reviewer asks when a photo was taken, and uncropped images preserve context that a close-up may lose.
Once you are ready to submit, the application portal guide can help you avoid a messy upload session. After approval, the rebate cheque status guide is the next practical step.
Red flags before you share photos or documents
Be cautious if someone asks for photos, utility bills, or personal details before you have verified the program and contractor. Rebate scams often lean on urgency, vague program names, and door-to-door pressure.
Use the Ontario energy rebate scam warning if an invoice looks odd or a contractor claims a rebate is guaranteed. A real file should still have a clear program path, eligible work, readable documentation, and no pressure to bypass the official process.
Deadlines can add pressure, but they should not make you sloppy. If attic insulation is part of your plan, check the attic insulation deadline guide before rushing a job without proper photo evidence.
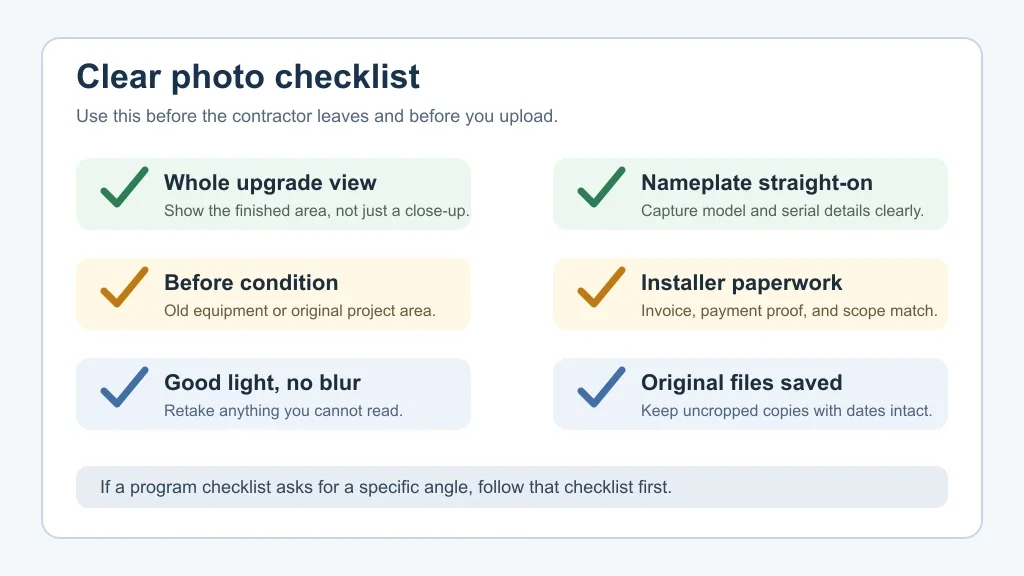
Quick Checklist
- Take wide before photos before old equipment or material is removed.
- Photograph every nameplate, model label, serial number, and meter straight-on.
- Capture during-work photos for insulation, air sealing, wall, attic, and basement projects.
- Take finished after photos that clearly show the completed upgrade.
- Match photos to the quote, final invoice, payment proof, and assessment report.
- Keep original uncropped files in a dated project folder.
- Check the active program checklist before uploading, because requirements can change by measure.
Bottom line
Good rebate photos are boring in the best way. They show what was there, what changed, and which installed product or work area matches the paperwork.
Before the contractor leaves, slow down and check the file. A few extra photos can prevent weeks of back-and-forth after the portal upload.
Frequently Asked Questions
do i need before and after photos for ontario rebates
Often, yes, but the exact requirement depends on the stream and upgrade. Heat pump and solar files can ask for specific equipment or installation photos, while assessment-based insulation work may rely heavily on the advisor report and contractor documents.
what photos are needed for home renovation savings rebate
Start with the old equipment or original work area, then capture the finished upgrade, equipment nameplates, labels, meters, and any program-specific checklist items. Keep the original files and avoid cropped or blurry uploads.
are blurry rebate photos accepted in ontario
Do not count on it. The solar post-installation checklist says photos must be clear or they will not be accepted, and that is the standard you should use for any rebate file.
should my contractor take rebate photos
They can help, especially for attic, wall, solar, heat pump, or nameplate photos, but keep your own copies. Before final payment, ask for every image tied to your invoice and project address.
can i submit ontario rebate photos after installation
For post-installation evidence, yes, photos are usually part of the completed file. But if a stream needs pre-approval, a pre-work assessment, or photos of old equipment, waiting until after removal can create problems.
Official sources: Heat Pump Program Stream Requirements · Solar Post-Installation Application Checklist. Check current program pages before applying.